This blog is moving

After many times trying to spell the blog name to some people who aren’t used to Portuguese words, and seeing that the majority of the visits to this blog come from both the United States and Great Britain, I decided to take another WordPress account and move this blog there:

http://justfoods.wordpress.com

I’ll continue posting some links to this blog for a while (mostly linking to the posts on the other blog), but will stop after some posts. So please update your RSS feed readers if you have one pointing to this blog.

Thank you!

Pineapple / ginger / spinach smoothie

After preparing the pork tenderloin with cachaça, I ended up with some pineapple leftover, since I didn’t use all that I had bought. The pineapples I were used to when growing up were really sweet and great to be had by itself, but around the Pacific Northwest they tend to be more to the sour side and are best used in recipes or salads. But while shopping at a supermarket, I remembered one situation where I was at a juice bar a few years ago. The person in front of me was having something light-green, which definitely didn’t look very enticing. The person behind the counter, probably noticing my puzzled look, offered me a sample.

DSC_0699

After knowing the ingredients (pineapple, ginger, spinach, frozen yogurt), I was even more intrigued, but when I tried it it turned out to taste really great, so every once in a while I prepare it again at home, and everyone who I’ve offered it to had the same reactions: puzzlement, surprise.

Ingredients (for 2 people):

  • 1”-long ginger root piece, peeled, sliced in small pieces (my blender isn’t too powerful, so cutting it that way helps preventing the fibers from getting in the juice)
  • 1 cup spinach leaves
  • 1/2 pint vanilla frozen yogurt
  • 1/2 cup pineapple, cubed

Blend well all of the ingredients. If your blender (like mine) can’t get the job done at first, you can help it by adding some water or milk, only enough to get it to blend. You may want to strain it to get some of the (small) fibers of the ginger out, but if it was sliced small enough it shouldn’t be an issue).

DSC_0704

Enjoy!

Pork tenderloin with cachaça

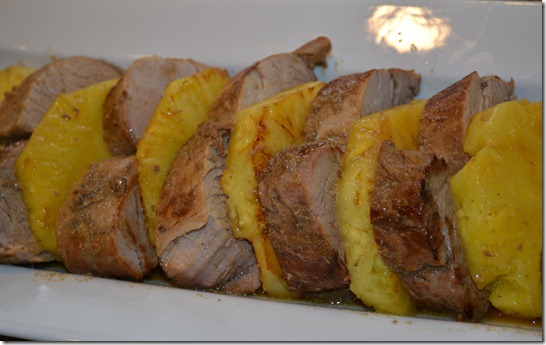
And as usual I’m back to my favorite Brazilian food book series, “Cozinha Regional Brasileira” (Brazilian Regional Cuisine) this time to the book about food from Paraíba, a state which borders where I grew up (Pernambuco). This is a recipe for pork tenderloin marinated with cachaça (a Brazilian spirit made from sugar cane, which can now be found in many stores in the US) and “mel de engenho” (molasses). Since the beginning of the colonization of Brazil brought many sugar mills (“engenhos”) to that region in the mid 1500’s, sugar and sugar-derived foods have been a part of the local culinary for many years now.

DSC_0663

This recipe had many ingredients which I like – pork, cachaça, and a combination of savory and sweet flavors which go really well with pork. The citric fruits (pineapple, orange and limes) combined greatly with the meat, and this turned out to be one of the best recipes I’ve tried in a long time, and will certainly be repeated in the future. It is also fairly easy to make, although it needs a long prep time.

Ingredients (for 6 people)

  • About 3lb. pork tenderloins, fat trimmed
  • 2/3 cup cachaça (I used one which I had from the state of Paraíba, to add to the authenticity, but since it was used in a marinade, any decent brand would work)
  • 2 tbsp. molasses
  • 1 orange, sliced in 1/4” circles
  • 1 lime, sliced in 1/4” circles
  • 1 tsp. ground cinnamon
  • 15 whole cloves (the recipe asked for ~1tsp. ground cloves, but since I only had the whole cloves, I used them and it didn’t cause any problems)
  • salt
  • juice of 1 orange
  • 1/2 pineapple (lengthwise), cut in 1/2” slices
  • 1 tbsp. olive oil
  • 2 tbsp. butter

The day before: store the tenderloins with the cachaça, molasses, sliced orange / lime and some salt in a closed Ziploc bag (or any recipient to hold the marinade, but remember to cover it with plastic film – the bag was the easiest thing I could find). Every 6 hours or so, shake the bag (or turn the tenderloins in the recipient) for the marinade to act over the meat evenly.

On a large pan, heat the oil and the butter. Remove the tenderloins from the marinade (don’t discard the marinade), and fry each side of them in the pan, until it starts browning. Strain the rest of the marinade into the pan, and add the orange juice. Cover the pan with a lid and cook for about 1.5 hours, turning the tenderloins a few times throughout the cooking.

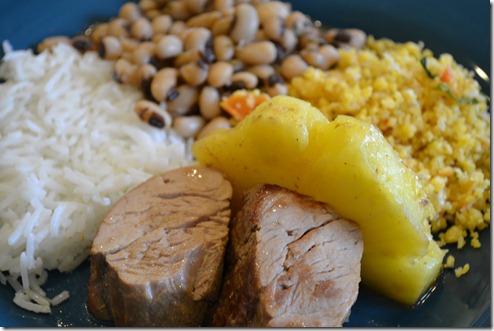
On a non-stick pan lightly buttered, fry the pineapple slices (both sides) then serve them with the pork, drizzling the sauce from the pan over it. Serve it with white rice, farofa de cuscuz and “feijão de corda” (black-eyed peas, recipe to come soon).

DSC_0669

Enjoy!

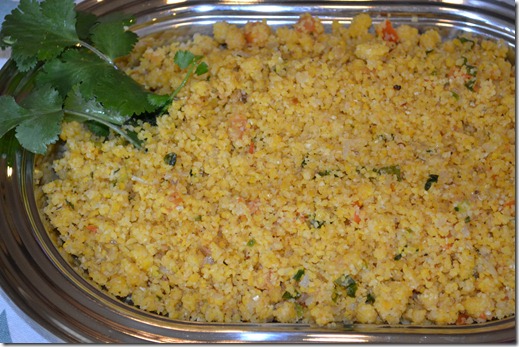
Farofa de cuscuz

“Cuscuz” is a very traditional Brazilian dish, based on a steamed ground corn (unlike the “couscous” more widely known in the US, made with semolina), typically served as a breakfast course, or as a part of a (fancy) supper. Depending on the region in Brazil, however, “cuscuz” can mean different things. In the Northeastern part of the country (where I grew up), cuscuz is a simple dish, made with nothing but cornmeal, water and salt, and served either with butter (and eggs) or with milk and sugar. In other parts, such as the Southeastern state of São Paulo, cuscuz (or the aptly named “cuscuz paulista”, where “paulista” is the adjective relative to that state) is a dish where the plain cuscuz is filled with vegetables, eggs and some meat (usually shrimp) – there’s one recipe on the Flavors of Brazil blog, one of my favorites for Brazilian cooking, written by a Canadian living in Brazil.

Cuscuz is very common (quite cheap, quick to make and nutritious), and in my house we used to have it a lot, and many times there would be leftovers. Since it could get dry if not eaten shortly after it’s made, reheated cuscuz wasn’t very sought after in our house, so we often used it to make “farofa” – instead of using the typical manioc / cassava flour, we’d use the dry cuscuz as the base of the recipe. It was a nice change, and depending on which seasoning was used (children tended to turn their noses to vegetables inside the “farofa”, and I wasn’t an exception) it could be a big hit. It can be used as a side dish accompanying any saucy meats or beans, since the dry cornmeal would be a greatly compliment to them.

DSC_0660

Making cuscuz in the US has always meant going to a Brazilian store and buying the pre-cooked versions which we used back home. But this time I decided to try with “native” ingredients only, so I tracked the cornmeal package which resembled the most what we have – and found an organic, medium grind cornmeal which would be the subject of the experiment. So I mixed it with water and salt, cooked it in the “cuscuz pan” (a 2-part steamer, with a bottom part for water and a sieved top where the food goes, with a lid) for more than the usual 10 minutes after boiling (since it wasn’t pre-cooked), and the result… turned out quite dry. So the cuscuz experiment by itself didn’t work, but it turned out to be a great consistency for a “farofa”. And that’s where it started.

There’s no “right” recipe for a cuscuz farofa – as long as you use some butter and salt, the remaining ingredients are usually what is on hand. I typically like to use onions (well sautéed) and tomatoes, and this time I also added green onions. I only had 1 tomato, but another one would have been better (and given it a nicer color as well).

Ingredients (6 people):

  • For the cuscuz:
    • 2 cups medium-grind whole cornmeal
    • 2/3 cups water
    • salt (1-2 tsp.)
  • For the farofa
    • 1 medium onion, finely chopped
    • 1 tomato, chopped in ~1/4” pieces
    • 1/2 cup finely chopped green onions
    • 2 tbsp. butter
    • salt & pepper

Prepare the cuscuz: in a medium bowl, combine all the ingredients, then mix it well. Let it rest for 10 minutes, transfer it to a steamer, with water on the bottom, then cook it for 30 minutes after it starts boiling on medium heat. Remove from the heat and reserve. Once it cools off, fluff it with a fork (or your hands) to remove and large lumps.

Prepare the farofa: melt the butter in a medium, non-stick pan over medium heat, then add the onion and the green onions, salt and pepper, and sauté them until the onions start becoming golden. Add the tomatoes, season it a little more and cook it for 2 minutes. Finally add the cuscuz and mix it well, until the corn absorbs all the moisture from the tomatoes and it’s fluffy again.

Serve it with any saucy food (meat with sauce or beans) and enjoy!

Tomato-mushroom frittata

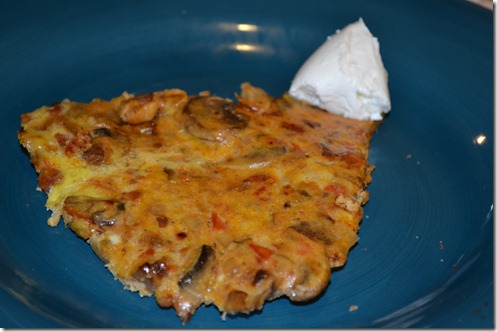
While reading Slate this week I saw a recipe for a frittata, it seemed like something easy enough to do and a nice break from the everyday bread / butter / cheese dinners which we usually have at home. Getting home I realized I definitely could not use the recipe from Slate (it was called “frittata with greens, feta and dill – I didn’t have any greens, feta or dill). So whatever was on the fridge became the recipe of the day.

DSC_0114

Since I had never cooked one before, I had no idea of quantities or even the material (pan) to use. I ended up using a very large (>12”) oven-safe skillet which I had, which ended up being too wide (the dish in most pictures looks deeper, mine ended up quite shallow), but the taste was actually pretty good. I ended up using the ingredients found in traditional omelettes, tomatoes / cheese (a Mexican shredded cheese blend, leftovers from a taco day) and mushrooms. It was indeed quite easy to make, being ready in about 30 minutes.

Ingredients (for 4 people)

  • 2 tomatoes, chopped
  • 1 onion, chopped
  • 1/2 cup shredded cheese (Mexican blend)
  • 4 eggs
  • 6oz. sliced white mushrooms
  • 1 tsp. ground nutmeg
  • 1 tbsp. olive oil
  • 2 tbsp. butter (onions)
  • salt & pepper

Pre-heat the oven to 350ºF (175ºC). On a medium, oven-safe skillet over high heat, add the olive oil and the butter then add the onions, season them with salt and pepper and sauté them until they’re golden. Add the tomatoes (adding a little more salt & pepper) and cook them for about 5 minutes. Add the mushrooms and mix well, cooking for another 5 minutes.

On a medium bowl, beat the eggs then add the cheese and the nutmeg. Remove the skillet from the heat, then pour the eggs over the onions / tomatoes / mushrooms, stirring gently to distribute the ingredients in the skillet. Transfer it to the oven and bake it until the top of the frittata is firm, about 10 minutes. Serve it immediately.

Enjoy!

Flambéed butter mushrooms

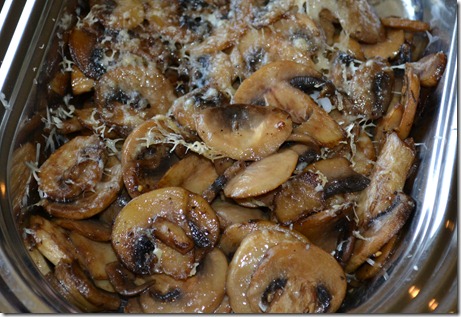
When shopping for the Yogurt-Chicken Curry, I bought a pack of sliced white mushrooms that I thought would go well with the sauce. But, as I do quite often, I forgot that ingredient and it remained chilling in the fridge until the next day when I realized my memory lapse… That same week I went to a friend’s house who was cooking some gougères (which were great, by the way), I noticed a recipe for flambéed mushrooms (I don’t know where it came from). Since I like to play with fire (and we still had some cognac left), the next dinner I decided to try it out at home.

DSC_0093

If you have pre-sliced mushrooms, this is really, really fast to prepare (about 10 minutes, or more if you want to gratin it with cheese as I did). It also tasted really good (although since I only had about 1/4 cup of cognac left it didn’t leave as much flavor as I ‘d wish), so I’ll definitely try it again.

Ingredients:

  • 8 oz. sliced white (button) mushrooms
    • Other kinds probably would work as well, such as chanterelles or shitakes.
  • 2 tbsp. butter
  • 1 tbsp. olive oil
  • 1/4 cup cognac (I’d use 1/2 cup if I had more)
  • grated parmesan or pecorino cheese (I used the latter, although the former would also work out just fine)
  • salt & pepper

On a large pan (non-stick is preferred), heat the oil and the butter until the butter is completely melted and starts foaming. Add the mushrooms, salt and pepper and sauté them for about 5 minutes, until there’s hardly any liquid left in the pan.

Remove the pan from the heat and add the cognac, lighting it up with a long match. Swirl the pan until the fire is extinguished. Transfer them to an oven-safe dish, then grate some hard cheese on top of it. Add to a pre-heated broil for 3 minutes, then serve immediately.

Enjoy!

Virado à paulista

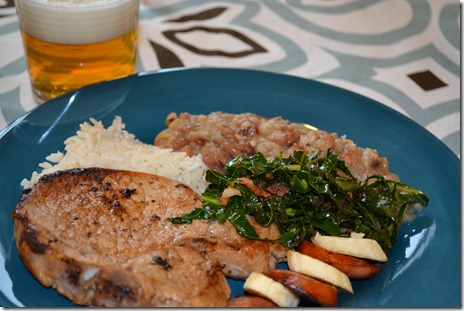
After a few months dabbing in international cuisine, I decided to go back to my favorite food collection, “Cozinha Regional Brasileira” (Brazilian Regional Cuisine, http://www.abrilcolecoes.com.br/colecoes/cozinha-regional-brasileira-486777.shtml), to try another one of the typical dishes from around Brazil. This time I chose one which is from the state of São Paulo, called “virado à paulista” (really hard to translate into English, it would be something like “food turned in the Paulista style”, paulista being the adjective from someone from that state). Never having tried the original, I also invited some good friends from that state to assess whether it was close to the “real thing”, so we have their impressions as well.
DSC_0075

First of all, this is not a very complicated or fancy dish. Far from that, the “virado” is a common lunch fare in that state, often served as a cheap lunch in many downtown restaurants for a blue-collar workers, but it has reached a “cultural” status that it’s appreciated by people from all income levels.

There are a few variations of the “virado”, but they all have some meat (pork or beef), white rice, “tutu de feijão” – beans mixed with “farinha” (dried, toasted manioc flour), “couve mineira” (thinly sliced collard greens fried with bacon and garlic), “calabresa” sausage (typical in Brazil) and banana. The banana can be of the regular kind, or one similar to plaintains, also raw or fried (breaded). Sometimes it’s also served with an egg on top. The one I made I used pork chops and a kielbasa in place of the calabresa, used plain bananas and skipped the egg (there was already a lot of food in the plate, the egg would have been too much).

Based on the “natives” opinion, it was quite close to the original, but the beans should have been cooked a little more. Since that was their only remark, I took that as a sign that the dish came out good 🙂

Ingredients (for 4 people):

  • 4 pork chops, bone in (~2lb)
  • 2 limes, juiced
  • salt & pepper
  • 6oz bacon, finely chopped
  • 1 tbsp. olive oil
  • 1 medium onion, finely chopped
  • 4 garlic cloves, minced
  • 1lb kielbasa, cut diagonally in 1/4”-thick strips
  • 3 cups cooked beans, with the liquid
  • 1/2 cup “farinha”
  • 2 bunches of collard greens

Prior to cooking: remove the stems from the collards and cut them into thin strips, then reserve. Season the pork with the lime, salt and pepper, and let it marinate for at least 30 minutes.

In a large pan, add the sausage slices and cook them both sides until they’re golden, about 3 each side, then reserve. If the sausage didn’t render a lot of fat, add a tbsp. of olive oil. Add the pork chops, then fry them until they’re close to the desired doneness, but not there, then move them to an oven pre-heated to 350ºF (175ºC) to finish in 10-15 minutes. In the same pan, add 4oz of the bacon, cooking them until the fat has been rendered. Add the collard greens (you’ll need a large pan, because it will be a lot, but they’ll shrink considerably) and salt, mixing it often while the beans are being prepared. When the greens are done, if you want to fry the banana, you can use the same pan to do so at that point.

For the “tutu”: while the bacon is being rendered in the large pan, add the remaining of the bacon and the 1 tbsp. of olive oil to a medium pan; when most of the bacon fat has been rendered, add the onions and the garlic, and cook until the onion is golden. Add the beans and cook for 10 minutes, mixing it occasionally. Add the “farinha” very slowly to prevent lumps from forming, mixing it well. Cook it for another 5 minutes, still mixing it often.

To assemble the plate, put some white rice, beans and a pork chop in each plate, then top the rest with the sausage, bananas and the collards. If you still want a little more cholesterol, feel free to top it off with a sunny-side up egg.

Enjoy!
Yogurt chicken curry

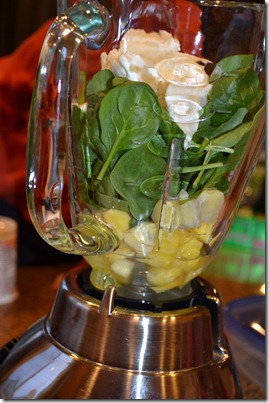
Growing up in Brazil I didn’t have a chance to have many curry dishes. There just aren’t many applications of this spice (or, as I learned later, mix of different spices) in the Brazilian cuisine, and apart from an occasion sprinkle of curry in an egg salad my mother would prepare, I just didn’t grow up eating this ingredient.

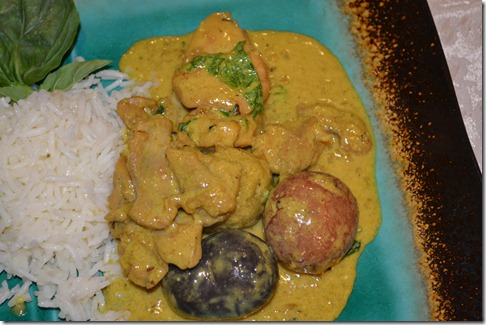
DSC_0070

After moving to the Seattle area, the large number of Indian restaurants (and other Southeast Asian restaurants as well) in the region reintroduced me to curry dishes. I actually always liked it, but rarely prepared something with it. This one is a recipe which I already prepared once, and it’s quite simple and fast to prepare. The most difficult thing this time was that I only had chicken thighs and I spent a lot of time trimming off the fat and the tendons, but if I had chicken breast / tenders it would have really been something that could be prepared in around 30 minutes.

The end result was quite good, especially given its simplicity. I have seen variations of this recipe in some websites that are even simpler (without the basil or onions), but I think they give a nice touch to the taste.

Ingredients (3 people):

  • 4 chicken thighs
  • 9 fingerling potatoes
  • 1 cup plain yogurt
  • 3 tsp. curry powder
  • 1 onion, finely chopped
  • 2 cups water
  • 2 tbsp. olive oil
  • 1/2 cup coarsely chopped basil
  • salt & pepper

Remove as much of the fat from the chicken thighs as you’re willing to (that’s a lot of work, which is why I mentioned that using chicken breasts would be easier), and cut them into bite-sized pieces. Season them with salt and pepper and reserve.

Meanwhile, boil water in a medium pan to cook the potatoes, and when they’re done (~10-15 minutes), remove the hot water and add cold water (or some ice cubes, if the tap water isn’t too cold) to stop the cooking.

Heat the oil in a large, non-stick pan and add the onions, seasoning it with salt and pepper. Cook until it almost start to burn (about 5-10 minutes), mixing often, then add the chicken and cook on high heat for 2 minutes, to sear the meat. Add the water, then cook it over medium heat for about 10 minutes, until the chicken is done (the water will have reduced at least by half). Add the curry powder and mix it well, then add the potatoes and the yogurt, mixing well to create a uniform sauce.

At the end, add the basil to the pan and cook for another 2 minutes to get the flavors of the herb in the sauce. Serve with white rice.

Enjoy!

Beer-onion soup – take 1

This is an attempt in a variation of the traditional French onion soup which came out tasty, but with a few things which need improvement – so I’ll have to try it again later. I’ve been with a cold lately, and my doctor said that soups would be a good thing to have. Mostly I wanted to have something light for dinner after a heavy lunch, so an onion soup seemed like a good idea.

DSC_0066 - Copy

Getting home I realized that it wouldn’t be a smooth ride. I only had one (medium) onion, and I’d need at least two of them – next time I’ll definitely use more. I also didn’t have any wine leftovers, and since I’m taking some medication for the cold and can’t drink alcohol, I didn’t want to open a full bottle to use only 1/2 cup, so I decided to use beer instead (as I had already tried, and liked, a Guiness stout onion soup in one of my favorite pubs), so I used a local lager, with good results. I also tried to cut corners and use a simple toasted sliced bread, but it wasn’t dry enough and ended up quite soggy, but next time I’ll try to get some hard bread or day-old baguette. Finally, I only had some Colby-Jack cheese so that’s what I used, but some harder cheese will probably be better. In the end, the soup itself was good, but we ended up scooping the bread out of the bowl and discarding it.

Ingredients (for 2 people):

  • 1 medium onion, thinly sliced (the best amount would be 1 small / medium onion per person
  • 2 tbsp. butter
  • salt & pepper
  • 2 cups chicken stock
  • 1 12-oz. bottle of beer (I used a lager; a darker one would work too – lighter beers probably won’t work as well)
  • 2 toasted slices of bread (as I mentioned, it didn’t work well – I’ll try it again with either store-bought croutons or a harder bread)
  • 2 slices of Colby-jack cheese
  • Parsley for decoration

Melt the butter in a medium pan and add the onion, salt and pepper, cooking for about 10-15 minutes, stirring constantly, until the onions are browned. Add the stock and the beer and scrape off the pan, and mix it well again, cooking for another 10 minutes over medium heat.

Transfer the soup to oven-safe bowls, top it with the bread, then the cheese, and add them to an oven pre-heated to 400ºF (200ºC). I find that placing the bowls in an oven tray helps getting them out easier. Bake it for 10 minutes until the cheese is melted; if you have a broiler you can also use it to speed up the baking (in ~3-5 minutes the cheese should be good).

Top with a small parsley sprig and enjoy!

Steak au poivre

Unlike many people in my family, my relationship with pepper didn’t start early. Quite often my parents and my brother would praise an even mildly spicy dish, and I’d be complaining that it was too hot. My father even grew some chilies at our house, but I never got too close to them. When I moved to the US over 10 years ago, I thought most foods were quite spicy, even a cheese pizza from Domino’s or Pizza Hut would have me reaching for water… Maybe my taste buds couldn’t take anything other than the lowest foods on the Scoville scale, I simply didn’t like piquant foods.

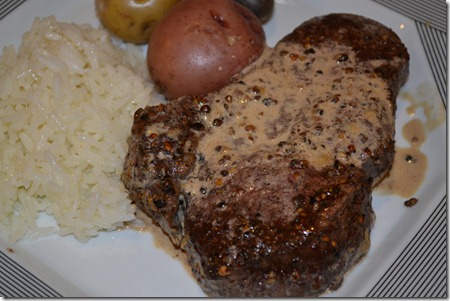
DSC_0004

So when I decided to prepare a Steak au poivre, that was definitely a proof that tastes change. Maybe because of not having another option in many restaurants I went out with friends, I started getting more and more used to spicy foods, up to the point where nowadays I even ask for a few stars in most Thai restaurants. I’m still not up to a “wings of fire” challenge, but I may get there sometime. Meanwhile, I decided to go into the famous French dish when shopping at Costco the filet mignon looked at me and almost begged me to take it home – I had never tried one, but I remember that it looked good when my parents would order one in a restaurant.

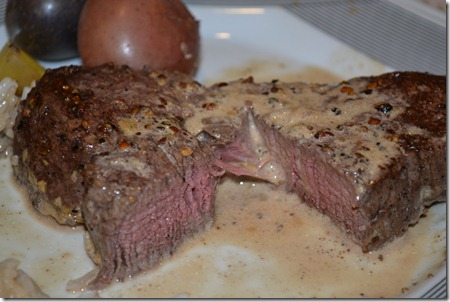
The recipe is quite simple, and not overly spicy (the cracked peppercorns ended up being a great compliment to the steak, without overpowering it). I decided to go with one recipe from Alton Brown from Food Network which seemed quite easy. A few modifications I did was that I used whipping cream instead of heavy cream (that’s what I had in the fridge) and followed one of the commenters suggestion to finish the steak on the oven. The sauce ended up a little thinner than the ones I’ve seen in picture over the web (likely because of the difference in the cream), but it turned out really good.

Ingredients (for 4 people):

  • 4 filet mignon steaks, about 1” thick, fat trimmed
  • 2 tbsp. whole peppercorns (I used a mixture of red / green / black I had in my pantry)
  • 2 tbsp. butter
  • 1 tbsp. olive oil
  • 1/3 cup cognac
  • 1 cup whipping cream
  • salt

Crack the peppercorns with a mallet (I used a cheesecloth to prevent it from going everywhere in the kitchen), and spread them in a plate. Season the steaks with salt, then press them into the pepper, until the surface is coated.

Pre-heat the oven to 350F (175C). On an oven-proof skillet large enough for all steaks, heat the oil and the butter until it starts smoking. Sear the steaks (1-2 minutes each side), then transfer the pan to the oven for about 10 minutes (for medium; adjust the time for other levels of doneness). Remove the pan from the oven, remove the steaks from it and set them aside (wrapped in a tinfoil tent to keep warm).

Carefully add the cognac to the pan (it may catch fire right away). If it still isn’t on fire, light it up with a long match, then stir the pan scraping the bottom until the flames die. Add the cream, bring it to medium heat whisking constantly, until the sauce thickens, about 5 minutes. Adjust the salt, then bring the steaks back to the pan, coating them with the sauce.

DSC_0008

Serve immediately with rice and potatoes. Enjoy!